
Beast of Reincarnation Taurus: Two Guides, Opposite Advice, Both Published
The Chapter 4 Nushi. The two people who have filmed it disagree about whether to crowd it or wait for it — so both routes are here with the reasoning each gives, along with the mechanics they do agree on.
The internal achievement id for this fight is ACH_NUSHI_USHI, which names ox — 牛 (ushi). Placed by the sync script with no judgement involved: this row's rank is currently unambiguous on both Steam endpoints. Taurus is the bull.
Clear order
3 of 7
Corroborated by two unrelated sources
Owners who have cleared it
36.2%
Valve’s live figure, re-read daily
How the name was established
confirmed
How well we know this fight
Where the evidence stands
Two sources, and they contradict each other on the central question of the fight. That is not a defect in the evidence — it is the most useful thing about it, and it is why this page prints both instead of picking one. One creator played it patiently after being killed repeatedly for pushing; the other says giving the boss space is exactly what gets you charged. They cannot both be describing an optimal line, and neither of them is guessing: both are reporting what happened to them. Everything they agree on is marked as such below, and it is a shorter list than either video implies.
The disagreement, stated as a disagreement
Read both and pick. The patient route comes from someone who says he lost several attempts to over-aggression and only cleared it once he stopped chasing; the aggressive route comes from someone whose reasoning is mechanical rather than experiential — distance is what enables the charge, so removing distance removes the charge. Neither has been tested against the other, and this site has not cleared the fight, so no verdict is published between them.
- Patient: let it come to you, respond to what it does, do not chase. Chasing it "just didn’t end up well".ChQ9cow90JM 01:30–02:00
- Aggressive: close the distance quickly, because too much space invites a fast charge that is hard to dodge.w6AtrnBp6YM 00:00
- Both agree it moves around the arena constantly, which is the fact the two conclusions are drawn from.w6AtrnBp6YM 00:00
What both of them do agree on
The overlap is small and mechanical, which makes it the part worth trusting. The most actionable piece is the parry rule: this boss does not let you parry everything, and the tell for which is which is range. Its close-range attacks are the telegraphed ones, so parrying is a thing you do when you are already in, not a thing you do to get in.
- The move set mixes parryable and unparryable attacks. Watch the animation rather than reaching for parry by default.w6AtrnBp6YM 00:00
- Close-range attacks are the well-telegraphed ones — parry those.w6AtrnBp6YM 00:00
- When it stops and plants itself in the ground, that is the damage window.ChQ9cow90JM 01:00–01:30
- Both press L3+R3 in that window to slow time and extend it.ChQ9cow90JM 01:30
- Spend Koo’s skills whenever they are up.w6AtrnBp6YM 00:30
The adds open the fight, and the swollen phase can end it
Two things bracket the encounter. It starts with additional enemies, and the creator who filmed it handles them first with a root rather than fighting the boss through them. It finishes with a phase where the boss swells with blight and gains one new string — a four-hit combo he says will take a full health bar on its own. The rest of the second phase is the same move set slightly slower, so the combo is the only thing to relearn.
- Root the adds at the opening and clear them before engaging properly.ChQ9cow90JM 00:00–00:30
- It hurts. A clean hit from the horns takes a large share of the bar.ChQ9cow90JM 00:30
- Phase two: it swells with blight and gains a four-hit combo that can clear a full health bar. The parries come fast.ChQ9cow90JM 02:00–02:30
- It also plants a horn in the ground to uppercut out of it. Do not let that one resolve.ChQ9cow90JM 04:00
- Otherwise phase two is the same move set, a little slower.ChQ9cow90JM 03:30
- Its ranged pattern: two swipes, run away, throw something, then a red ground attack.ChQ9cow90JM 02:30
Lv. 20, and the name is the client’s rather than a creator’s
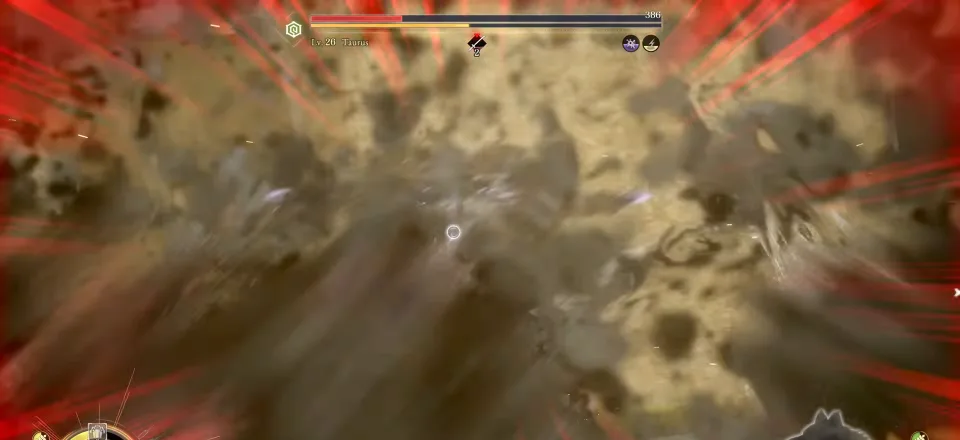
The still above is not a screenshot of the boss — it is a dust explosion with the boss buried in it, and it was captured that way on purpose. The frame was chosen for the health bar, and the bar prints both the name and the level in the shipped game’s own text: Lv. 20 Taurus. That is the standard `/bosses/` holds the whole roster to, and it is why the name on this page does not depend on anyone’s video title or on a machine caption mishearing a proper noun. The level is one observation from one player’s run: nothing here establishes whether the fight scales to you, and no source addresses that either way.
- The health bar reads “Lv. 20 Taurus” in the client’s own text.SCut20Mkt2c 01:10:50
- One run, one reading. Whether the fight scales with the player is unestablished.SCut20Mkt2c 01:10:50
One loadout, one player, printed as his
The patient creator shows his full equipment at the end of the video, and it is the most complete build read anywhere in our boss coverage. It is one person’s kit against one fight and is not a recommendation from this site — but three of its pieces are chosen for reasons he states out loud, and those reasons are checkable against systems catalogued elsewhere here. He calls the boss weak to acid and builds into it.
- Weak to acid — he runs a poison sword and acid bolts and arrows.ChQ9cow90JM 00:30–01:00
- An entanglement Spirit Stone that starts the fight with the gauge already at two.ChQ9cow90JM 07:00
- A Koo charm returning HP whenever Koo’s skills are used — his stated reason for surviving the mistakes.ChQ9cow90JM 01:00
- The Odd Appetite mod on Koo, granting FP on hit against enemies already suffering corrosion.ChQ9cow90JM 07:30
- One caution he found the hard way: L3+R3 does not work while you are committed to an iai stance.ChQ9cow90JM 05:30
Taurus — questions players actually ask
Sources for this page
- BLIND_Playthroughs — Taurus Boss Guide: Full Strategy — Hands-on, uploaded 2026-08-08 — the first filmed Taurus commentary. Chapter 4, acid weakness, adds to be rooted at the opening, and a four-hit combo in the swollen phase the creator says clears a full health bar. It is also the fullest equipment read anywhere in the boss set: an entanglement stone opening the gauge at two, a Koo charm returning HP on skill use, and the Odd Appetite mod granting FP on hit against corroded enemies. Its central advice — be patient, let it come to you, being aggressive got him killed — directly contradicts Trophy Guides below, and both are published.
- Trophy Guides — Taurus Boss Guide — Uploaded 2026-08-04, thirty-seven seconds. The other side of the Taurus disagreement: close the distance quickly and stay aggressive, because giving it space invites a charge that is hard to dodge. Cite it for that position and for the mechanical claim the two sources do agree on — the move set mixes parryable and unparryable attacks, and the close-range half is the telegraphed half.
Video ids and timestamps are printed beside each claim above rather than collected here, so any single line can be checked without reading the page twice.
Keep going